Best Practices for Using Outlook
Although there’s no one “right way,” to use Outlook, there are a few things you can do to get the most out of your Outlook experience.
Microsoft Support Center
The Microsoft Support Center offers step-by-step guides, tutorials, videos and resources.Attend a Webinar
OIT regularly offers training sessions on popular Microsoft 365 tools.Outlook YouTube Videos
Check out our YouTube channel for helpful video tips.Meet Outlook
First time using Outlook? We’re happy you’re here. The Outlook application in Microsoft O365 helps users manage their email messages, calendar, contacts and tasks. You can access Outlook on the web at outlook.com or through an Outlook desktop or mobile app.
Quick Mail Settings
Conversation View
- By default, messages are displayed in Conversations View. A conversation includes all messages in the same thread with the same subject line. Conversation view is easy to turn off if you prefer to see all messages in a list.
Focused Inbox
- Focused inbox is enabled by default. Focused inbox allows you to view your most important mail first. You may choose to turn off the focused inbox setting to only have one inbox.
Email Signature
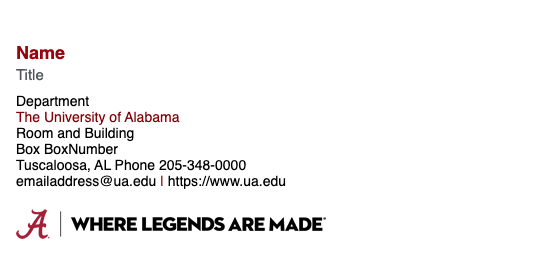 Add a signature to your email account by visiting outlook.com and signing in. Then click the settings icon at the top left. Scroll to the bottom of the settings panel and choose View all Outlook settings.
Select Mail then Compose and Reply. Under Email signature, enter your signature and use the available formatting options to change its appearance. You can create a branded UA signature on the Strategic Communications website. Simply copy and paste the signature you create into this field.
To enable your signature to appear at the bottom of all new email messages, select the Automatically include my signature on new messages I compose check box. Select Save.
Repeat these steps on each device where you have Outlook installed (mobile + desktop).
Favorites
Give visibility to folders that are otherwise buried in your mail folder list by using favorites. Favorites, a subset of your mail folders, appear at the top of the navigation pane. By using Favorites, you can minimize the Navigation Pane and still successfully file your messages by dragging messages to the minimized bar, perform common searches, and navigate to the Calendar, Contacts, and Tasks.
We suggest having the following folders in your Favorites: Inbox, Sent Items, and Deleted Items.
Archiving Mail
Exchange online archiving offers a place to store older mail that you wish to keep. An archive mailbox is a specialized mailbox that appears alongside primary mailbox folders in Outlook or Outlook on the web. Users can access the archive in the same way that they access their primary mailboxes. In addition, users can search both their archives and primary mailboxes.
Enable Archiving
- Visit Outlook online.
- Right click the folder you wish to archive.
- From the pull-down menu that appears, select Assign Policy.
- From the Archive Policy drop-down menu, choose Personal 1 year move to archive (1 year).
Archiving policies are set for 1 year in the O365 version of the desktop Outlook app. The online archive does not count towards the mailbox storage limits. Unlike PST files, data in the online archive mailbox is stored in the Office 365 cloud account and not on the personal computer. This will result in your archived data being available online through your Office 365 account even if your computer stops working. Learn more about archiving mail on Microsoft’s website.
Junk Email
The Microsoft 365 mail environment allows for many different security options to better block and label malicious email. OIT continuously adjusts security tools and settings to combat evolving phishing email attacks.
Additionally, Microsoft Outlook has built-in tools to help combat phishing. If you receive a message in your inbox that you suspect to be phishing, in the toolbar click the drop down menu beside “Junk” and select “Phishing”. If you receive a message in your Junk folder that you suspect to be phishing, click “Report Phishing” in the toolbar. By doing this, you train your inbox to better recognize junk and phishing emails.
Occasionally, “good” email can be accidentally marked as spam and be delivered to the junk folder. Regularly check your junk folder. If you find a message in your junk folder that is actually a “good” email, mark the message as “Not Junk” to help train your inbox to better recognize and deliver messages appropriately. Additional instructions are available on the Microsoft website.
Email Limits
OIT maintains an email limit for senders using Microsoft 365 to protect against unwanted malicious email. Contact OIT if you think you may need to be added to the high volume senders exception list. Please note, Microsoft also imposes a limit of 10,000 emails per day. Once an account reaches this limit, messages can’t be sent from the mailbox until the number of recipients that were sent messages in the past 24 hours drops below the limit.
Rules
Rules help organize your Outlook to reduce the amount of unnecessary “noise” in your Inbox and to make the most important items arrive at the top. Rules move messages into folders based on set criteria. It’s considered best practice to have the following rules:
- Automatic Replies – Move all responses to meetings that don’t have content to Deleted Items. You can see who has accepted by checking the tracking tab inside the meeting window.
- To: Me – Any message sent directly to you or with you on the Cc line is sent to the Inbox and isn’t processed by other rules, even if it’s also sent to a Contact Group.
- Meeting Requests Sent to Inbox – All meeting requests, even if sent to a Contact Group, should be sent to the Inbox.
- Messages that go to an already established folder – If you have a folder dedicated to a project or group, you can establish a rule that automatically moves emails related to that topic to the folder you have already created.
To-Do Bar
The To-Do Bar is the panel on the right side of Outlook. It shows you a calendar, your upcoming appointments, and your unified task list, which contains:
- Messages you need to respond to (flagged messages).
- Contacts you need to call (flagged contacts).
- Tasks that come up spontaneously.
- The best practice for setting up the To-Do bar is to:
- Show a Date Navigator (turned on by default).
- Show tasks (turned on by default)
Categories
Categories in Outlook allow you to manage items in many different ways. There are three main types of categories that we recommend creating:
- Project (can include people)
- Topic
- Location or Activity
To create categories, on the Home tab, in the Tags group, select Categorize, and then select All Categories.
Quick Steps
Quick Steps give you the ability to perform multiple actions in one click. They are a useful tool to help you keep a clean inbox and to generally be more efficient at using Outlook. Any time you find yourself repeatedly doing the same steps in Outlook, try creating a Quick Step.
Searching Effectively in Outlook
- If you want to find a message from a particular person, select the Search box in any folder, and then on the Search tab, select From.
- Type the person’s name.
- Or start by typing the name in the Search box, and then press the down arrow key to select From to narrow the results.
- To find a message with an attachment, select the Search box and on the Search tab, select Has Attachments.
- To find messages across your whole mailbox, select Current Mailbox on the Search tab.
- To find a message that was part of a meeting request, search in All Outlook Items.
Calendar and Meetings
Calendar Permissions
Because students, faculty and staff are in the same mail environment with O365, anyone can view someone else’s public calendar. Individuals can change calendar permissions to be private or only share limited details. OIT recommends changing calendar settings to show free/busy availability. This makes it easy to schedule meetings with others when users can see free/busy times.
Scheduling a Meeting
Choose a time when everyone can meet by looking at the invitees’ free/busy information in Calendar. Use the Scheduling Assistant to view all meeting attendees availability. The free/busy grid shows the availability of attendees. A pair of lines and a highlight show the proposed start and end of the meeting.
To view the Scheduling Assistant when composing a meeting request, on the Meeting tab, in the Show group, select Scheduling Assistant. The Room Finder pane contains suggested times for the best time for your meeting (when most attendees are available). Also, consider using an online meeting app such as Microsoft Teams.
FindTime
Trying to schedule a large-scale meeting? Try using FindTime! FindTime shows what days and times work best for all attendees. It allows attendees to vote and quickly come to a consensus. If you’ve used Doodle Polls in the past, we encourage you to try FindTime.
Add-in Apps
Unauthorized apps from non-verified publishers may not be added into 365 applications without verification and approval from OIT. To request an app addition, users will be prompted to complete a request form that will be routed to and reviewed by OIT Security.
Contact Groups
You can set a separate folder for Contact Group messages (listservs, mailing lists or distribution lists).
Frequently Asked Questions
What should I do with folders I don’t need anymore?
The Navigation Pane folder list should be reserved for folders you use often. If it’s filled with folders you don’t even recognize, move all mail into the reference folder and delete your existing folders.
When should I use conversation view?
Conversation view is useful when:
- You check your messages less frequently, and therefore have more messages to view at a time.
- You have many message threads that have a lot of back-and-forth discussion.
- You need to see the context of who has responded to whom.
- You get a lot of messages.
By viewing your messages in conversation view, you can easily see which conversations have had the most back-and-forth discussion. In those cases, you might want to read and respond to only the last message in the conversation. You can also select an entire conversation and act on it. For example, there might be a lengthy series of messages where the last one simply states, “Thanks, that answers my question,” so you can just delete the whole conversation.
You can also see messages from other folders when you are in conversation view, which is very helpful when you receive a new message on a lengthy conversation — you can see the whole history, including your replies.
How do read and unread states help me?
Read and unread states in Outlook help by showing you quickly which messages have been read at least once and which have not. However, the read and unread states of messages can be easily be triggered by clicking around your messages so they aren’t a perfect record — just a tool. To quickly mark a message as read, press the keyboard shortcut Ctrl+Q. To mark it as unread, press Ctrl+U.
Why should I file my messages?
It’s a best practice to have a central repository for your messages, so that you can refer to them after you’ve “dealt” with them.
Why should I use rules?
As time goes on, you will likely receive more and more messages. You can’t read every message you receive — nor should you try to. Rather, just read the messages that are important for you to read. Rules will help you prioritize important messages and minimize distractions. Just because a message has been sent to you (or to a distribution list you subscribe to), you don’t have to read it, nor is a response expected.
Why keep my tasks in Outlook?
Why a task list in Outlook works better than a paper list:
- Paper lists can’t automatically be kept up-to-date.
- Paper lists can’t be easily rearranged.
- You can use Outlook on the web to view your task list from anywhere.
- Outlook integrates with OneNote and Microsoft SharePoint Server and your mobile device.
- Paper lists can be easily lost.
Visit the Microsoft Support Center for more!
The Microsoft support center has step-by-step guides, tutorials, videos and resources that can answer any questions you may have.