
Note: Instructions below were made using the Chrome browser. Before starting the Applications Manager upgrade you will need to install a newer version of Java compared to the previous versions needed.
1. To install Java, go click the link below to download Java JDK 21
https://download.oracle.com/java/21/latest/jdk-21_windows-x64_bin.exe
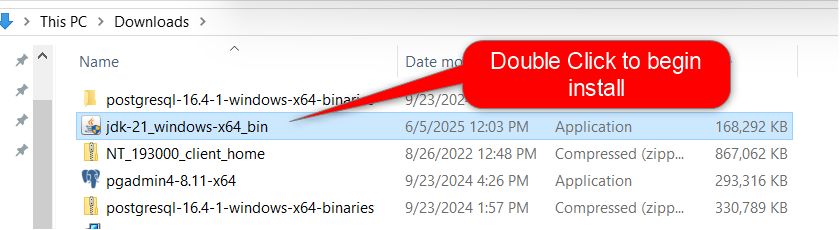
2. These instructions assume that your browser downloads files to your Downloads folder by default, from your downloads folder double click the JDK-21 Install File to begin
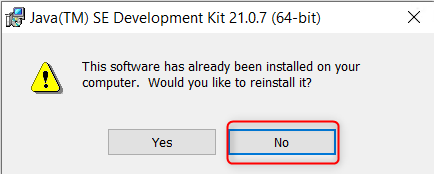
If you already have JDK-21 installed you will be prompted to re-install, click “No”
If you already have JDK-21 installed, skip to step 7
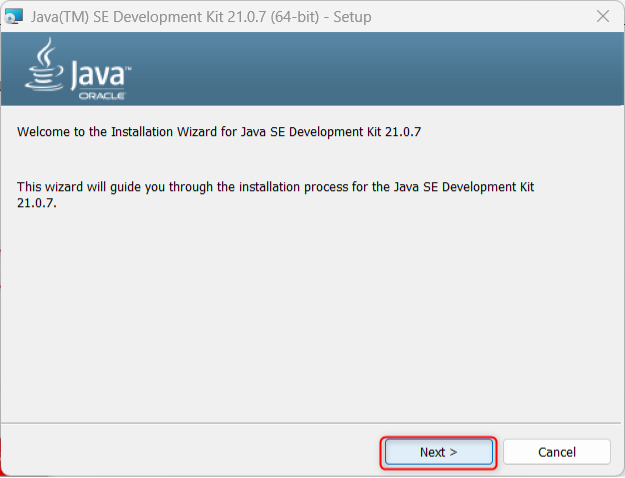
3. When you open begin the installation this is the first screen you will see is the screen below, just Click “Next”
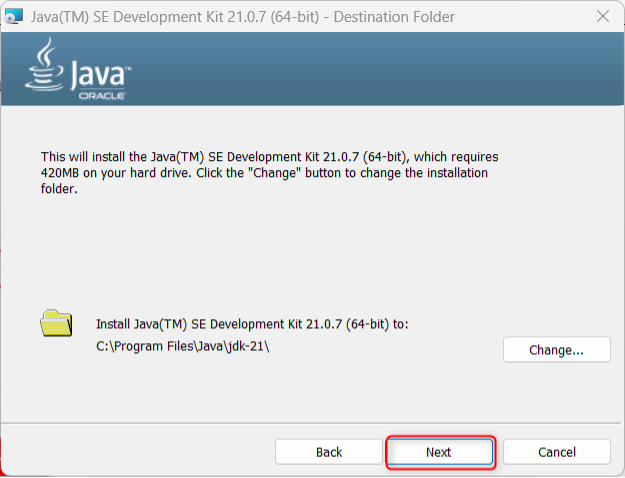
4. You can choose to change your install location but it is not necessary, you can just click “Next”
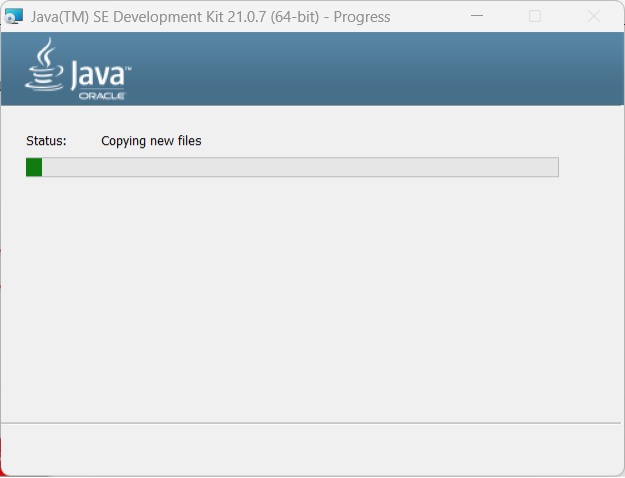
5. The install will take a few minutes to run
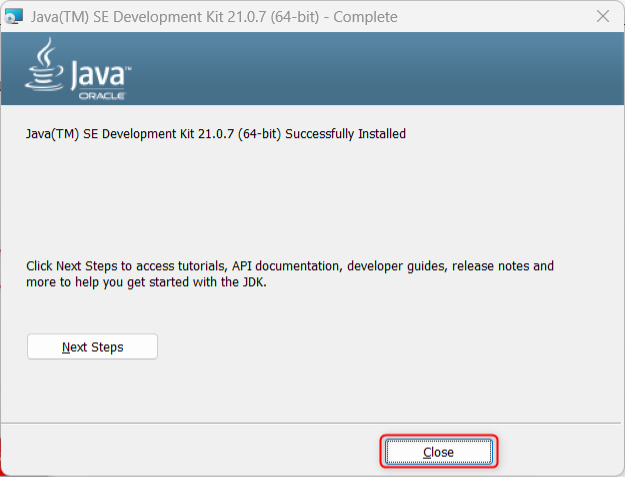
6. When the upgrade is complete you can simply click “Close”
7. Once you have completed the Java 21 upgrade, you can proceed to the Applications Manager Client Install.
8. Click the link below:
https://oit.ua.edu/software/applications-manager/
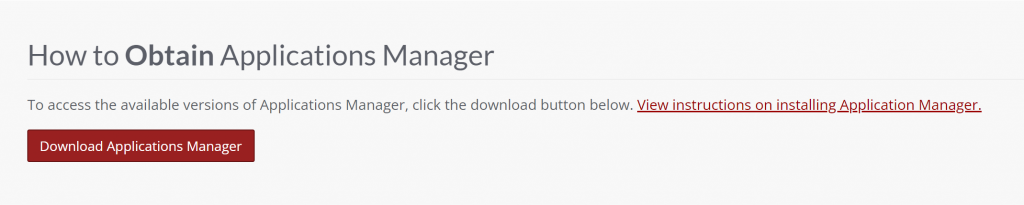
9. Click the Download Applications Manager link.
10. You will be required to login to proceed.

11. Click the Applications Manager link.

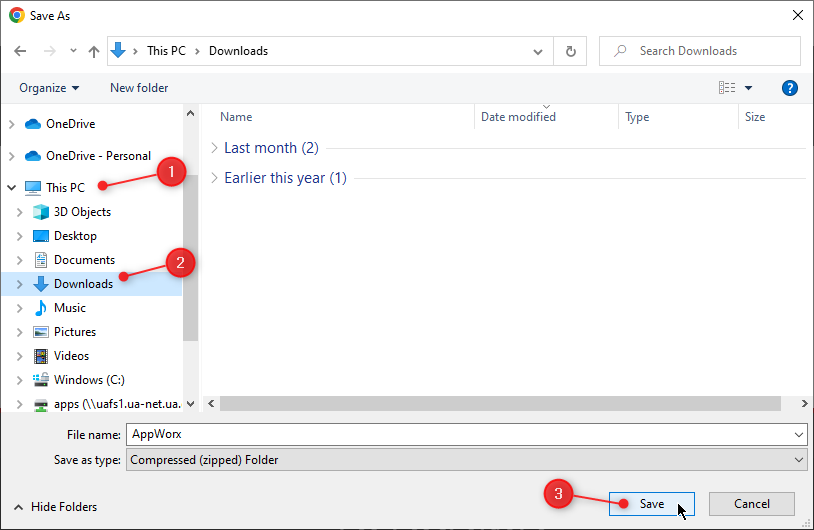
12. These instructions assume that your browser downloads files to your Downloads folder by default. If asked where to save the file, click on This PC, then Downloads, and click Save.
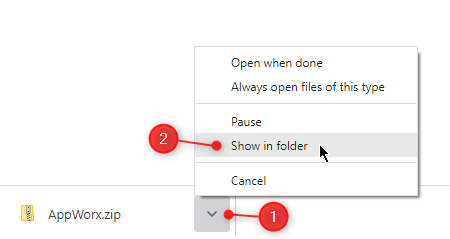
13. After it downloads, click the file at the bottom left side of the browser window. Left click on the caret to display the menu and left click on Show in folder.
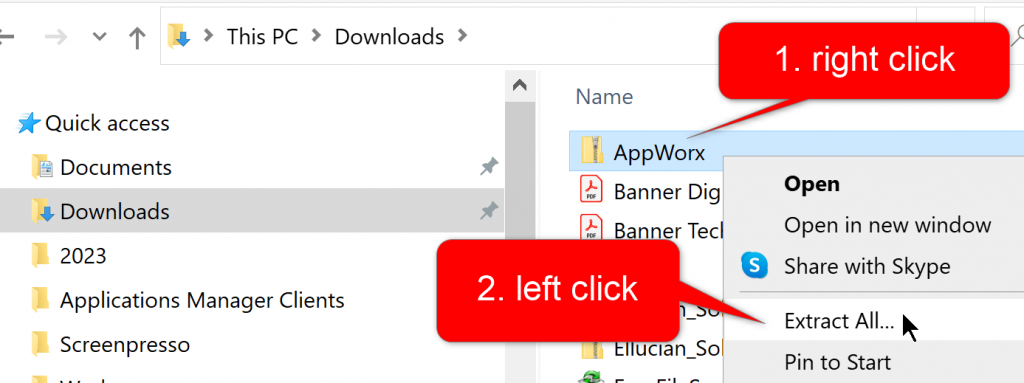
14. Extract the contents of the AppWorx.zip file by right-clicking on it and left-clicking Extract All.
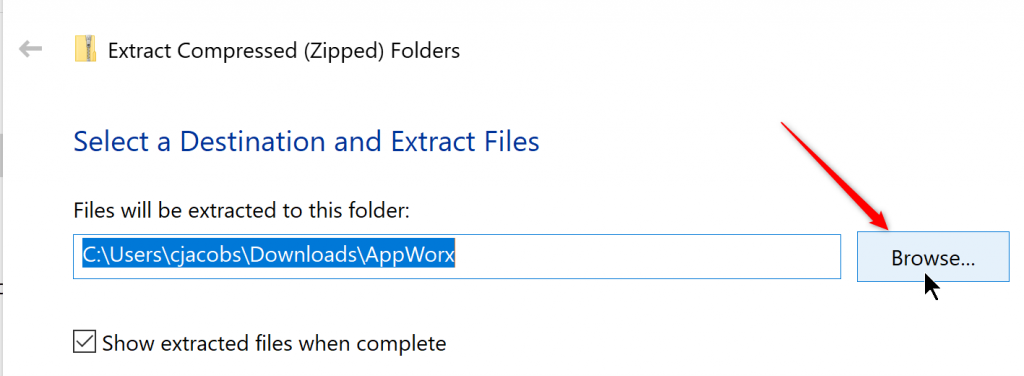
15. Click Browse to select a different destination folder. Note: Your user ID will display in the destination folder instead of ‘cjacobs’ as in the example below.
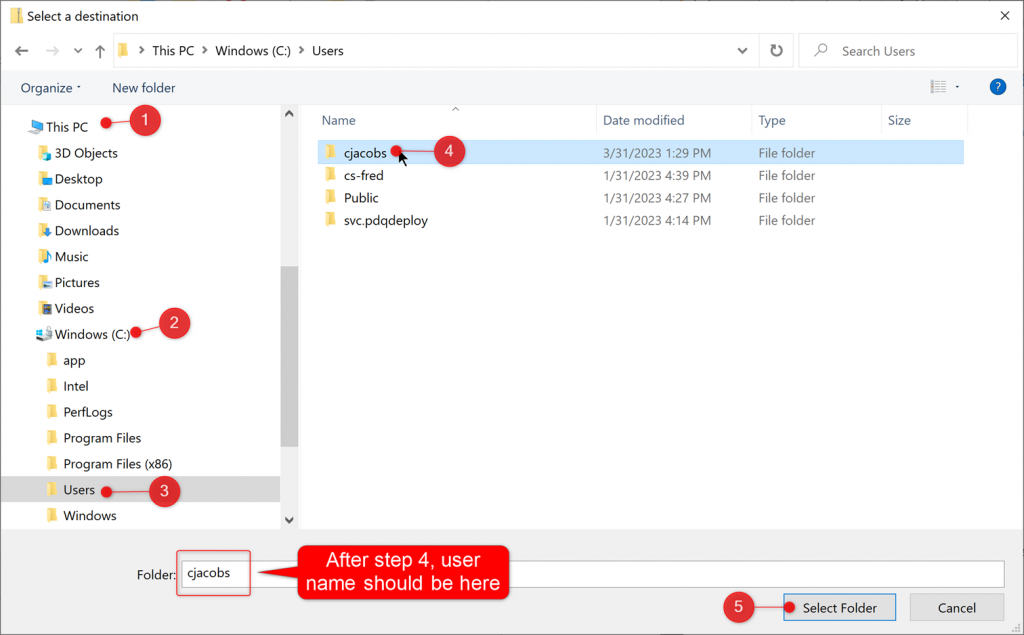
16. Click on 1. This PC, 2. Windows (C:), 3. Users, 4. The folder that matches your user ID. In this example, the folder matches my user ID, ‘cjacobs’. Confirm your user ID is in the Folder text box. Click on 5. Select Folder.
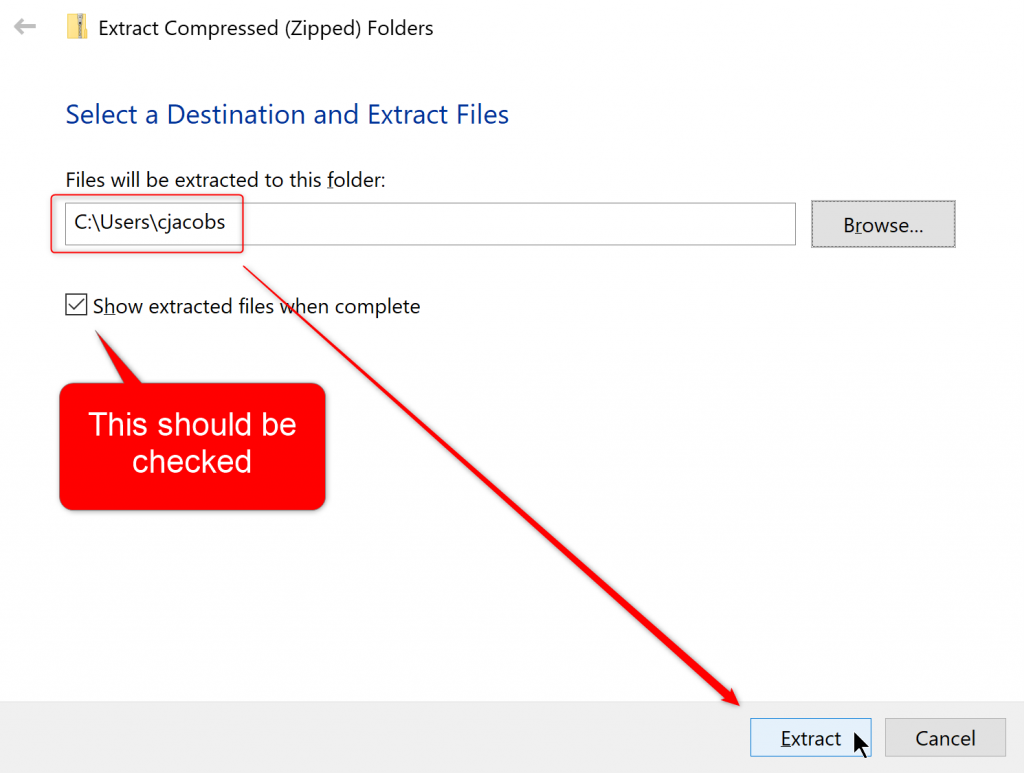
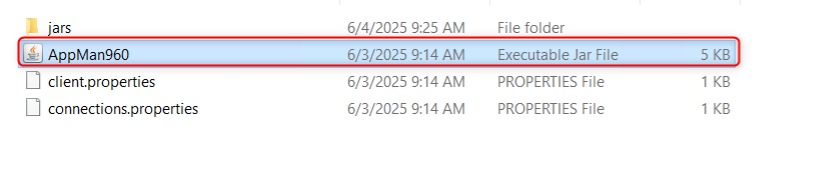
17. The destination folder will look similar to the example below except that your user ID will appear instead of ‘cjacobs’. Leave the box checked to show extracted files when complete. Click Extract.
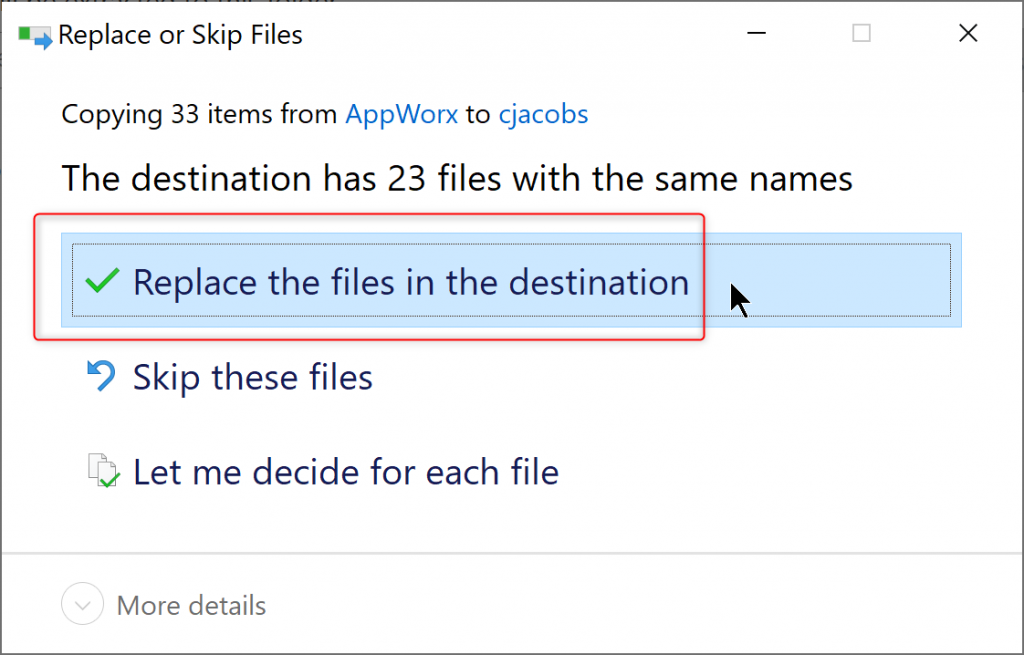
18. If you already have used Applications Manager on this computer, the AppWorx folder may already exist. If so, you may see a message asking whether to Skip or Replace files. Click the option to replace the files in the destination.
19. A progress bar will briefly appear and then disappear.

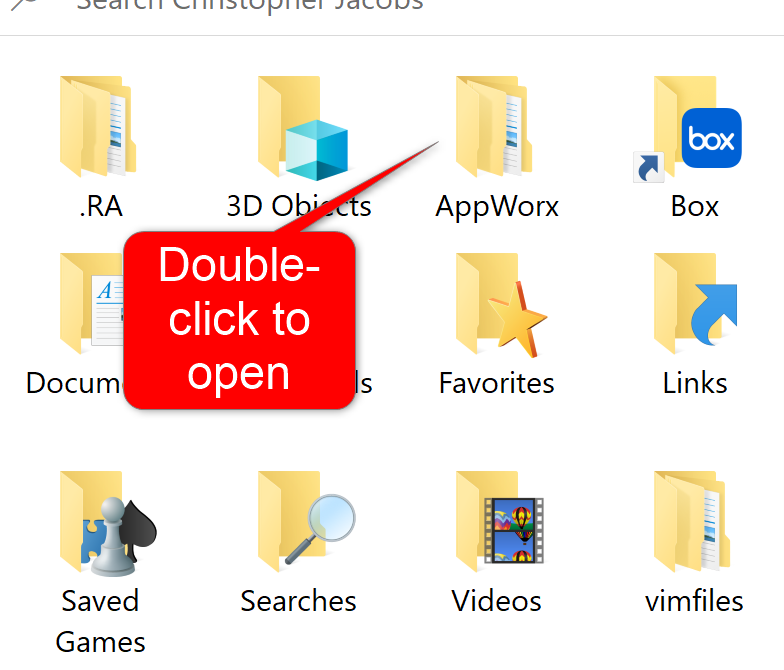
20. A list of folders will open. Double-click the AppWorx folder to open it.
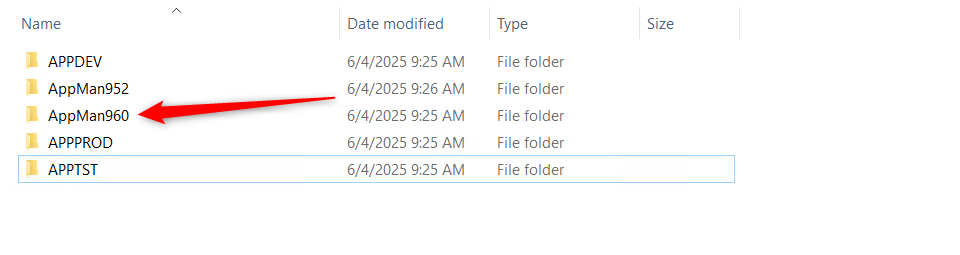
21. Double-click the folder containing the version of the client you wish to use. In this example, open the AppMan960 folder.
22. Right-click the file that runs the client and left-click Create shortcut.

*In Windows 11, you will need to select “Show more options” to get to the Create Shortcut button.
23. Copy and paste the shortcut to a convenient location such as your desktop.
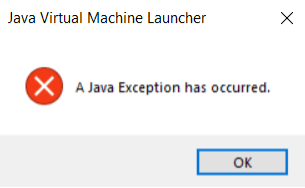
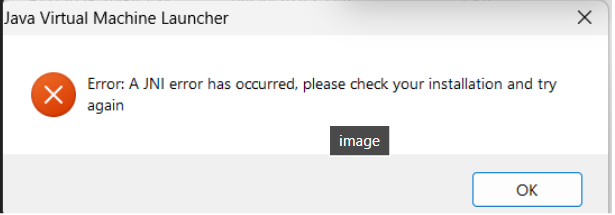
24. If you receive either of the errors below it is because you do not have the correct version of Java and will need to install Java JDK 21 found at the beginning of the instructions.
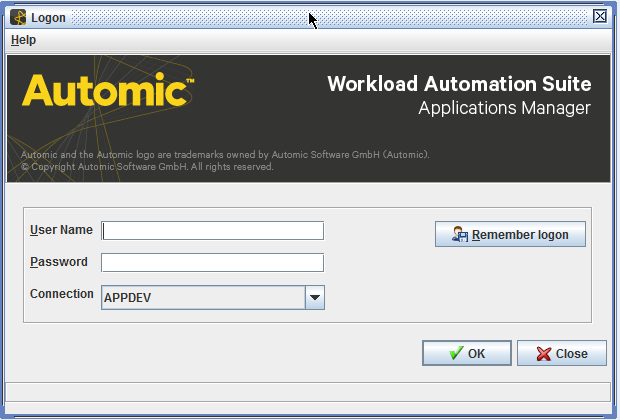
25. Enter your username and password and click Ok.
26. If you see an error message like the one below, use the correct version of the client to log in to that Applications Manager environment. An older version of the client cannot log in to a newer version on the server. Likewise, a newer version of the client cannot log in to an older version on the server.

If you need assistance, please contact the IT Service Desk using the contact information at this link: https://oit.ua.edu/services/userservices/